Nurturing curiosity in preschoolers is crucial for their intellectual and cognitive growth. Science experiments offer preschoolers an engaging means of learning about the world around them while turning abstract concepts into tangible lessons. By providing hands-on experiences, these experiments appeal to their innate sense of wonder and stimulate the development of essential skills like problem-solving, critical thinking for kids, and creativity. Introducing your young children to the joys of scientific discovery early on can set them on a path of lifelong learning and curiosity. This guide delves into the top science experiments perfect for preschoolers to explore, laying the foundation for a love of science and an unwavering intellectual appetite.
The Importance of Science in Early Learning
Science is more than a school subject; it is a way of understanding and interpreting the world. Its integration into early learning can foster children’s innate curiosity and boost their academic growth. Here’s why science holds significant importance at the preschool level:
- Development of Problem-Solving Skills: Through experimentation, children learn to predict, observe, analyze, and draw inferences, honing their problem-solving capabilities.
- Cultivating a Sense of Curiosity and Exploration: Science triggers children’s natural curiosity about their surroundings, prompting them to question and explore the world around them.
- Enhancing Cognitive Growth: When children engage in scientific activities, they learn to use their cognitive abilities, like memory and concentration, more effectively.
- Creating a Base for Future Learning: Early exposure to science helps build fundamental knowledge that supports further educational growth in science and other academic areas.
Necessary Preparations for Conducting Science Experiments

Before diving into the world of science experiments with your preschooler, certain preparations can ensure a smooth, enjoyable, and educational experience. Here are a few key considerations:
- Safety First: Ensuring that all experiments are safe and age-appropriate is paramount. Keep materials out of reach that could be harmful if ingested or handled improperly, and always supervise your child during the experiments.
- Gather Necessary Tools and Materials: Prepare all the tools and materials needed for the experiments in advance. This will ensure a seamless execution and sustain your child’s interest throughout the experiment.
- Explain to Your Child: Brief your child about what they can expect from the experiment, the materials they will be using, and the instructions they need to follow. This will create anticipation and foster understanding.
Remember, the goal is to explore, learn, and have fun!
Top Science Experiments for Preschoolers
Inspiring curiosity in young children is essential for their cognitive development, and conducting hands-on science experiments is effective. Below are twelve fun and educational science experiments suitable for preschoolers to explore.
1. Homemade Lava Lamp Experiment

Ignite your child’s curiosity with this fun and engaging lava lamp experiment, teaching density and color usage in a playful manner.
Purpose: Teach children about liquid density and chemical reactions.
Materials: Clear plastic bottle, water, vegetable oil, food coloring, Alka-Seltzer tablet.
Instructions:
- Fill a bottle 1/3 full with water, and add oil nearly to the top.
- Drop food coloring into the bottle; wait for the color to reach the water.
- Break Alka-Seltzer into pieces and add to the bottle.
- Observe bubbles rising and falling.
Explanation: Alka-Seltzer reacts with water, creating carbon dioxide bubbles. These bubbles rise through oil due to being less dense, pulling colored water with them. You may refer to Fizzics Education for ideas.
2. Color Mixing Experiment
This exciting experiment from Play to Learn Preschool explores the world of colors as kids blend primary colors to discover new shades and deepen their creative understanding.
Purpose: Foster understanding of color creation using primary colors.
Materials: Six small clear cups, water, and food coloring (red, blue, and yellow).
Instructions:
- Fill three cups half full with water.
- Add a few drops of food coloring to each cup: red in one, blue in another, and yellow in the third.
- Place an empty cup next to each filled one.
- To create secondary colors, slowly pour equal amounts of two primary colors into the empty cups (red+blue=purple; blue+yellow=green; red+yellow=orange).
- Let the preschoolers observe how the primary colors mix to create new colors.
Scientific Explanation: When two primary colors combine, they create a secondary color. This is due to the way light interacts with the pigments in the food coloring.
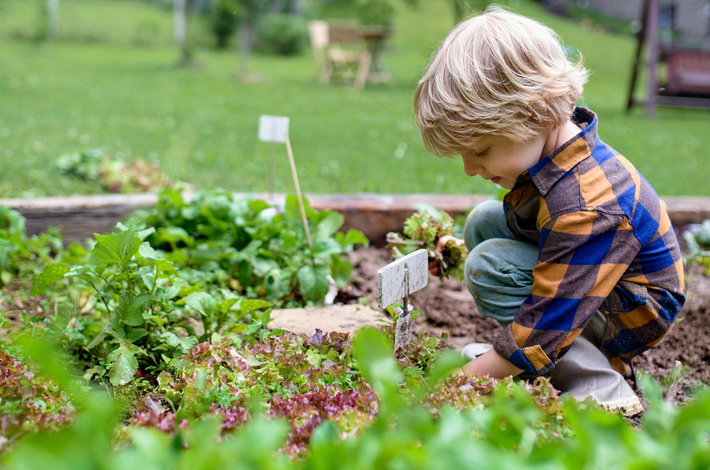
3. Growing Plant Experiment

Nurture the love for nature and life science as young learners participate in growing their plants, witnessing firsthand the growth process.
Purpose: Understanding the plant growth process from seeds and the importance of sunlight and water.
Materials: Clear cup, potting soil, bean seeds, water, sunlight.
Instructions:
- Fill the plastic cup about halfway with potting soil.
- Place a bean seed near the edge of the cup (so it’s visible as it grows) and cover it with a thin layer of soil.
- Water the soil gently until it’s damp but not soaked. Place the cup in a sunny area.
- Observe daily as the seed sprouts and grows into a small plant. Keep the soil moist during the process.
Explanation: This experiment demonstrates photosynthesis; plants need sunlight, water, and soil to create energy and grow. Observing the seed’s germination, sprouting, and development visually explains this process.
4. Ice Melting Experiment
This chilly yet captivating ice-melting experiment introduces preschoolers to the fascinating science of temperature and states of matter.
Purpose: In order to demonstrate how heat can change the physical state of water from solid (ice) to liquid.
Materials: Ice cubes, Bowls or plates,
Instructions:
- Place an ice cube in each bowl or on each plate.
- Set the containers in different areas with varying temperatures (e.g., by a sunny window, indoors in a cool area, and outdoors in shade).
- Observe the ice cubes over time and discuss which ice cubes are melting the fastest and why.
Scientific Explanation: The ice melts because of the heat energy surrounding it. The warmer the adjacent air or surface, the faster the ice melts, demonstrating how temperature affects the state of matter.
5. Cloud in a Jar Experiment
Bring the wonders of weather and atmospheric science indoors, capturing children’s imagination with this mesmerizing cloud-in-a-jar experiment.
Purpose: To illustrate how clouds form through condensation.
Materials: Glass jar with a lid, Warm water, Ice, Aerosol hairspray
Instructions:
- Pour about 1 inch of warm water into the glass jar.
- Place the lid upside down on the jar, then put the ice on top.
- Wait a minute or two for the jar to cool down.
- Remove the lid and quickly spray a small amount of hairspray into the jar.
- Replace the lid and ice, then observe as a cloud forms inside.
Scientific Explanation: The warm water inside the jar creates water vapor, which begins to cool as the temperature decreases. The tiny hairspray particles serve as “condensation nuclei” for water vapor to latch onto, forming visible water droplets and creating a cloud.
6. Color Reveal with Chemical Reactions

Unveil the secrets of chemical reactions using safe household items, allowing children to explore the thrilling world of chemistry and color change.
Purpose: Display the vibrant colors unleashed by an engaging baking-soda-and-vinegar chemical reaction.
Materials: Muffin tins, food coloring, baking soda, vinegar.
Instructions:
- Fill each muffin tin with a food coloring drop, then top with baking soda.
- Let kids squirt in vinegar to witness bubbling colors.
Scientific Explanation: This experiment exhibits the reaction between an acid (vinegar) and a base (baking soda), which creates carbon dioxide, causing the colorful, effervescent display.
7. Making a Giant Bubbles
Who doesn’t love bubbles? Little scientists learn about surface tension in this delightful experiment while gleefully creating giant bubbles.
Purpose: To illustrate surface tension in a hands-on, engaging way.
Materials: Hard-shell kiddie pool, Dish soap (Blue Dawn), Hula hoop.
Instructions:
- Fill the pool with water, add dish soap, and gently mix.
- Place the hula hoop with the child inside the pool, and evenly lift the hoop to wrap them in a giant bubble.
Scientific Explanation: Surface tension, the force that maintains bubble integrity, results from the cohesive forces between liquid molecules. Create unforgettable memories while unveiling the science behind bubbles!
8. Dancing Rice Experiment
Watch grains of rice groove to the beat of their drum in this lively experiment that enlightens young minds about gas pressure.
Purpose: To demonstrate an effervescent chemical reaction that delights the eyes.
Materials: White vinegar, baking soda, instant rice, clear jar, water, and food coloring (optional).
Instructions:
- Fill the jar 3/4 with water; add food coloring if desired.
- Put in 1 TBS baking soda and stir well. Include 1/4 Cup instant rice.
- Pour 1-2 TBS white vinegar and watch the rice dance!
Scientific Explanation: The reaction between vinegar (acid) and baking soda (base) creates bubbles of carbon dioxide gas. These bubbles attach to the rice and cause it to move around, creating dancing effects! You may visit Green Kid Crafts for more details.
9. Homemade Slime

Unleash creativity and sensory play with this homemade slime experience as kids explore various textures, colors, and the science behind slime formation.
Purpose: Craft your DIY gooey slime and unveil the fascinating science behind it!
Materials: Arm your aspiring chemist with white glue, baking soda, and contact lens solution.
Instructions:
- Mix glue and baking soda in a bowl.
- Gradually add contact lens solution, mixing until desired slime consistency forms.
Scientific Explanation: Diving into this enthralling activity unveils a chemical reaction at play. White glue (polyvinyl acetate) and contact lens solution (boric acid) combine to form stretchy, long molecules, yielding captivating slime! I Heart Naptime provides detailed instructions on how to make homemade slime.
10. Volcano Eruption
Witness the classic childhood favorite, volcano eruptions, as chemical reactions and geological wonders at home enthrall preschoolers.
Purpose: This experiment simulates a volcano eruption, involving young learners in an exciting, hands-on scenario that introduces key principles of chemistry and geology.
Materials: You’ll need baking soda, warm water, white vinegar, dish soap, a mixing container, an erupting base, and a stirring spoon.
Instructions:
- Combine baking soda, dish soap, and water to make a pourable slurry in a separate container.
- Transition this mixture into your volcano base.
- Lastly, add the vinegar, step back, and watch your homemade volcano come to life!
Scientific Explanation: This interactive experiment exemplifies a chemical reaction showcasing the viscosity and forceful emission of ‘lava,’ akin to real-life volcanic eruptions.
11. Floating and Sinking Objects
Delve into the fascinating concepts of buoyancy and density with this floating and sinking objects activity, awakening scientific inquiry in young minds.
Purpose: This experiment engages young learners in exploring the concepts of buoyancy and density by observing objects that float and sink in water.
Materials: A large container filled with water, Various small objects (e.g., plastic toys, coins, aluminum foil, fruits), Towel for cleanup
Instructions:
- Ask children to predict if an object will float or sink before gently placing it in a container filled with water.
- Discuss the outcome of each object and compare it with their predictions.
- Invite children to experiment with different arrangements or alterations of objects to change their buoyancy.
Scientific Explanation: Floating and sinking can be better understood by learning about the density of objects and the upward force of water (buoyancy) acting against gravity.
12. Balloon-powered Rockets

Propel your child’s interest in engineering and physics with this thrilling balloon-powered rocket experiment, teaching air pressure and force in a thrilling way.
Purpose: The Balloon-Powered Rockets experiment captures preschoolers’ curiosity by demonstrating basic principles of physics, such as air pressure and force, in an engaging, play-based way.
Materials: A long piece of string, A balloon, A straw, Adhesive tape
Instructions:
- Thread the string through the straw, tying the ends securely between two stable points.
- Inflate the balloon, keeping the end closed.
- Carefully tape the inflated balloon to the straw.
- Release the balloon, and watch the joy as your preschooler’s rocket takes off!
Scientific Explanation: As the air forcefully leaves the balloon, it propels the balloon in the opposite direction, bringing Newton’s third law of motion to life for young learners.
Final Thoughts
In the earliest years of development, cultivating an interest in science shapes young minds, fostering a lifelong thirst for knowledge and curiosity. Early exposure to science education provides the groundwork for critical thinking and problem-solving skills. Always remember transforming education into a fascinating, fun-filled exploration is the key to engaging young learners.
If you’re a parent of a preschooler seeking a reliable daycare that offers a dynamic learning environment, Baby Steps Daycare could be your answer. From mathematics to exciting science experiments, we inspire curiosity and build a strong foundation in various disciplines. Give your child the best start on their educational journey. Please connect with us today.

